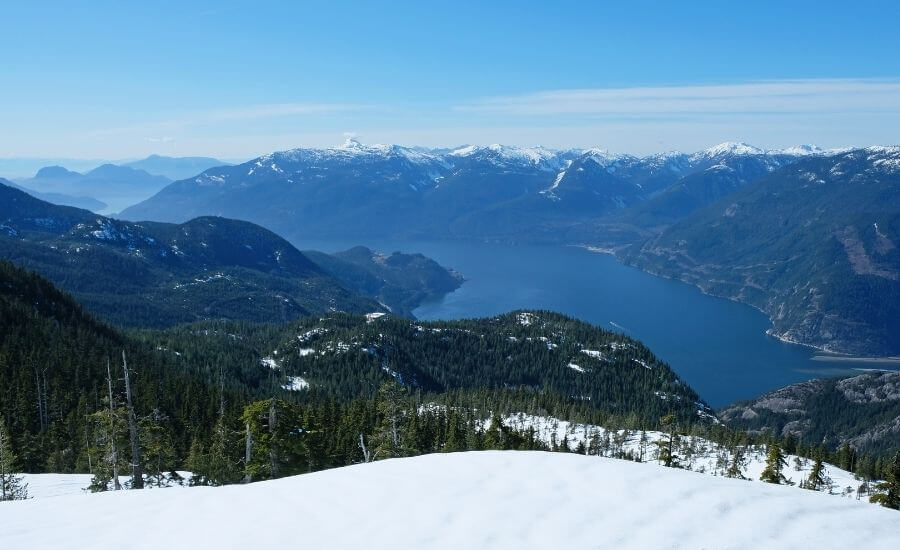
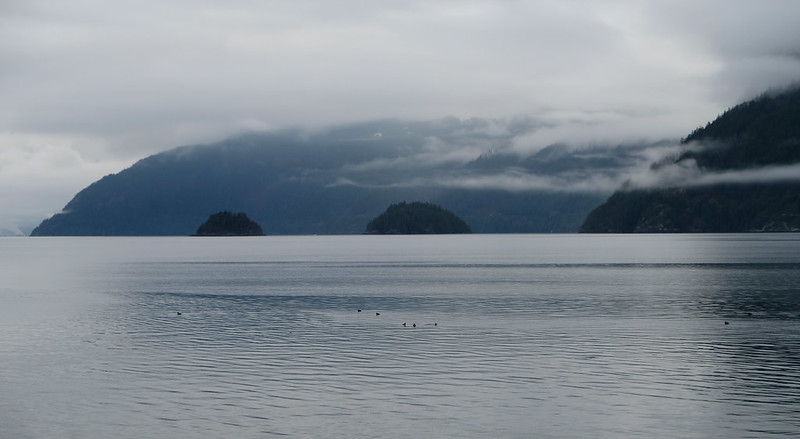
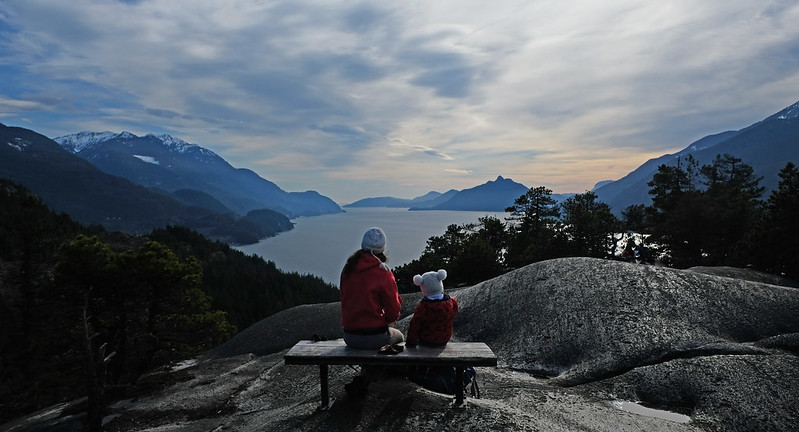
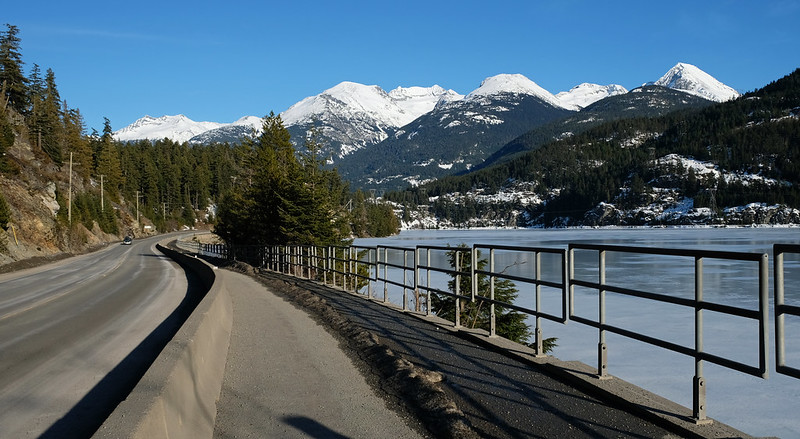
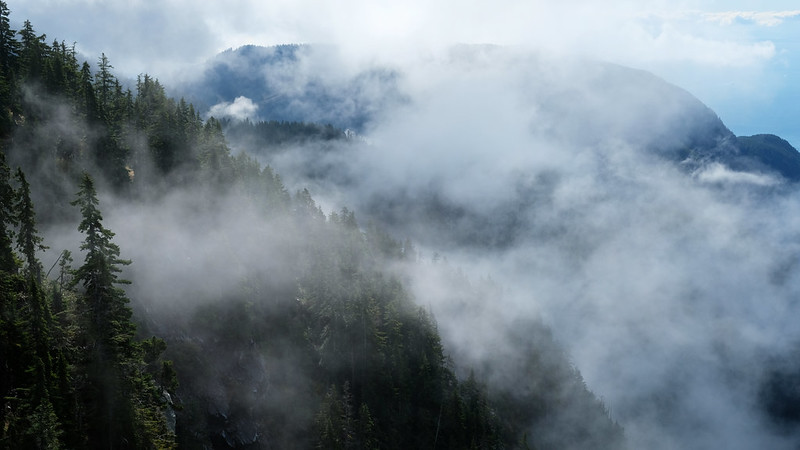
The views I saw on the drive from Vancouver to Whistler are how I imagined Canada in my dreams: towering cliffs and evergreen pine forests, foggy bays and snowy peaks in the distance. Rain or shine, summer or winter, the Sea to Sky Highway enchants with stunning views!
We’ve done this road trip to Whistler (or a part of it) about 15 times already since we moved to Vancouver, and many of our favorite hiking trails and waterfalls in the area are along the way. Driving to Whistler from Vancouver is a highlight for any nature lover who travels to Vancouver, and it’s one of the best scenic drives in North America (we dare say, and we’ve done a few…). In this post we’ve listed all the best places to see and useful information to know before you.
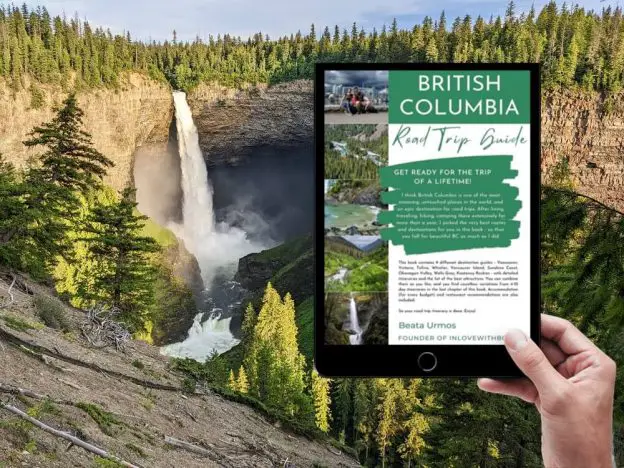
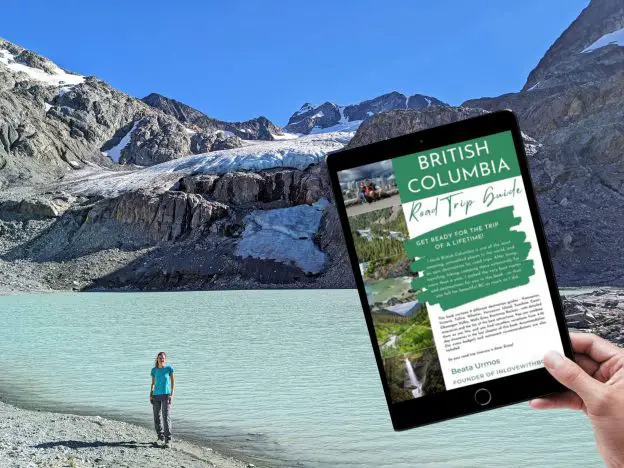
BC Trip Planning is Overwhelming. So We Did It For You.
Our compact guide delivers step-by-step itineraries to BC’s best sights and hidden gems.
DO YOU NEED A CAR FOR YOUR ROAD TRIP? SEARCH, COMPARE AND SAVE:
Discover Cars is one of the world’s largest online car rental platforms with vehicles in 10,000+ locations. Compare the best rates here.
How long is the drive from Vancouver to Whistler?
British Columbia Highway 99, affectionately nicknamed as the Sea to Sky Highway, is 163.13 km (101.36 miles) long and connects Vancouver to Pemberton (a bit north of Whistler). It truly earns the name as it connects the sea, Vancouver and Howe Sound, to the sky, the mountains of Whistler and Pemberton. And it offers stunning ocean and mountain views all the way!
The Vancouver – Whistler road trip driving time is about two hours one-way, in light traffic and good weather, but that’s without any stops. The minimum we recommend is a day trip from Vancouver, but even better if you have 2-3 days to include some of the longer, spectacular hikes along the way, as well.
Being about halfway between Vancouver and Whistler, Squamish is great for an overnight stay, especially that it’s not called the “Outdoor Recreation Capital of Canada” for nothing. Whistler Village offers lovely rooms and cabins, and there’s plenty of playgrounds in the area. So break up your road trip into several days, stop for beach walks and scenic hikes, we’re sharing countless to choose from. You can also find sample itineraries for 1-3 days (scroll further).
Sea to Sky Highway on a map
First of all, we created a map where we marked all the attractions – viewpoints, hikes, sights and places to stay – along this stunning drive.

Click here to open the Sea to Sky Highway interactive map!
Best stops between Vancouver and Whistler
So the Sea to Sky Highway starts from Vancouver. Highway 99 crosses Downtown Vancouver, and takes you out of the city through Lions Gate Bridge. It connects with Canada 1 through North and West Vancouver, then continues along Howe Sound towards the north. But let’s not hurry too much, because both North Vancouver and West Vancouver offer plenty of pretty detours from your main route. And as you scroll further, I’m listing all the stops that come after as you drive towards the north.
Capilano Suspension Bridge Park, North Vancouver

This park is one of the most popular attractions in Vancouver. You can see spectacular rainforests at other places in North Vancouver, but the connecting treetop walks and suspension bridges make Capilano Suspension Bridge Park truly one of a kind, with the 70 meters high giant suspension bridge above Capilano Canyon as the highlight.
Buy your ticket in advance. Plan about 2-3 hours to visit the park, depending on how quickly you walk (and how many photos you take). If you have the time, North Vancouver easily deserves a full day though. You can hike in Lynn Canyon and the Lynn Valley, and we have a confession to share: we like that even more than the famous suspension bridge park.
Address: 3735 Capilano Rd, North Vancouver
Time needed: about 2-3 hours
Cypress Mountain Lookout, West Vancouver
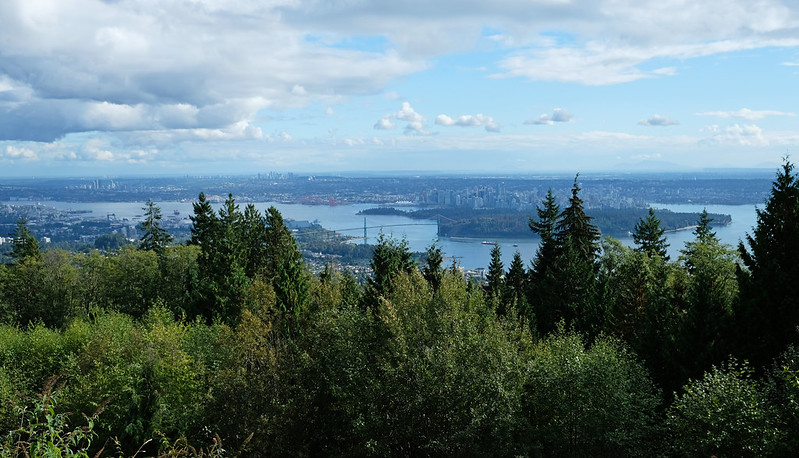
For the best bird’s eye view over Vancouver, take exit 8 for the Cypress Bowl Road from the highway. This lookout is right on the second switchback of Cypress Bowl Road, an easy stop which could be your gorgeous farewell to Vancouver.
Cypress Bowl Road takes you up to Cypress Provincial Park and its many beautiful mountain trails, but to return to the Sea to Sky Highway, you head back down the way you came.
Address: Cypress Bowl Rd, West Vancouver
Time needed: about 15 minutes
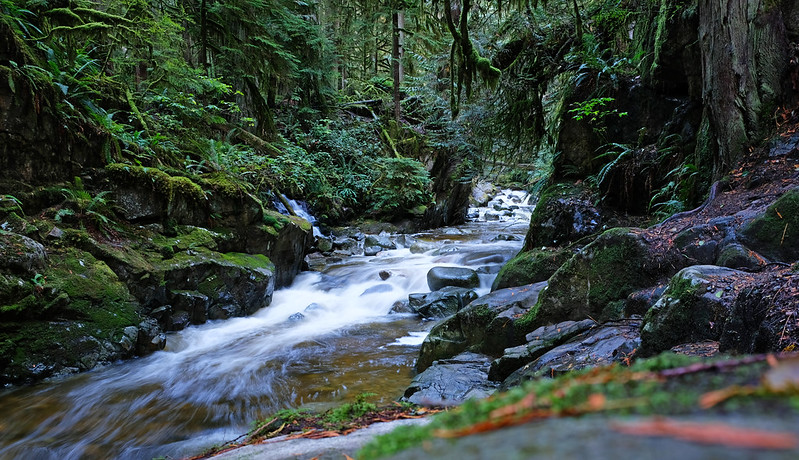
Cypress Falls Park, West Vancouver

Cypress Falls Park is a short detour from the highway, and it’s a small park that spoils you with two waterfalls, three waterfall viewpoints and all that in a charming, lush green rainforest setting. The Lower Cypress Falls viewpoint is really only a short walk from the parking, but it’s worth continuing up to the first and the second viewpoints of Upper Cypress Falls. Views of the small canyon are lovely as you hike up, and the upper falls are even more impressive than the lower one.
Address: Woodgreen Pl, West Vancouver
Time needed: about 1-1.5 hour
| Cypress Falls hiking essentials |
|---|
| Trailhead: Cypress Falls Park parking area at Woodgreen Place |
| Length: 1.4 km one-way |
| Difficulty: easy |
| Check out the trail map here! |
Lighthouse Park, West Vancouver
Despite being right by the ocean, Vancouver doesn’t have many coastal trails. The coast is either a series of beaches and oceanfront promenades (which are quite captivating, by the way, but mostly on the rare sunny days), or it’s not accessible. Lighthouse Park is one of the prettiest places to go for coastal hikes, and it’s only a 10 minute drive detour from the Sea to Sky Highway.

Take exit 4 for Caulfeild Drive/Woodgreen Drive, and leave your car in the parking on Beacon Lane. The park has about 6 km of trails altogether, so you can get to the most spectacular viewpoints quickly. But which are those?
Juniper Point is the first one, then there are several viewpoints along Shore Pine Trail. You can climb onto the rocky plateaus to find a scenic picnic spot. Keep an eye out for seals. We saw them from the shore each time we visited this park!

For the most photographed viewpoint, the one with the lighthouse, you need to take the short, steep trail down to West Beach. Don’t hike all the way to the beach though, rather find a suitable spot on the rocky plateau above it for the best lighthouse views. (You can’t visit or access the lighthouse itself. It’s fenced, and this is the only spot in Lighthouse Park where you can have a view of it.) Then you can return to the parking lot on Beacon Lane Trail or any of the parallel trails that run in the forest and join Beacon Lane at some point.
Address: 4902 Beacon Ln, West Vancouver
Time needed: about 1.5 hour
| Lighthouse view loop hiking essentials |
|---|
| Trailhead: Lighthouse Park parking on Beacon Lane |
| Length: 2.7 km loop |
| Difficulty: easy |
| Check out the trail map here! |
Whytecliff Park, West Vancouver
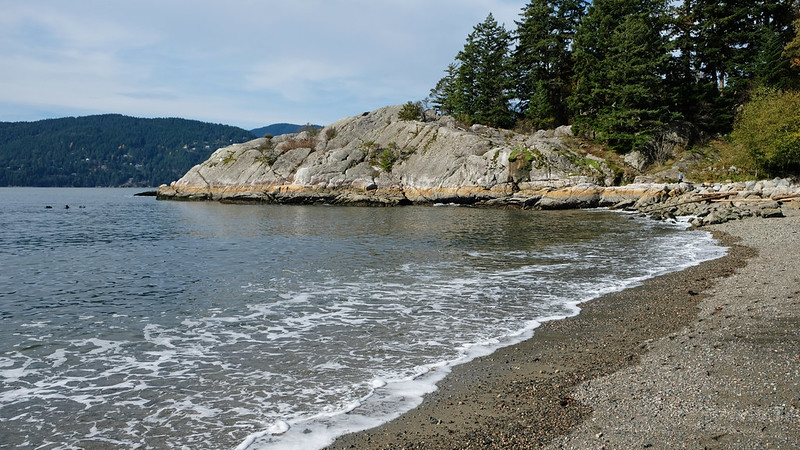
Whytecliff Park is another oceanside park in West Vancouver. Unlike Lighthouse Park, it doesn’t have hiking trails, just a short coastal walk that connects the beach with a few lookout points, picnic benches and a playground. At low tide you can scramble across the rocks to Whyte Islet from the beach, and it’s a great place to spot seals.
Even though it’s a quick stop, and there’s no hiking to do here, plan for about an hour to enjoy the beach, have a picnic and explore Whyte Islet.
Which one to choose: Lighthouse Park or Whytecliff Park? (Wherever you find available parking. It’s no joke, both are extremely busy on a prime summer day.) It depends on your preference: if you’d like to hike on the coast, go to Lighthouse Park, if you want direct access to a nice beach, go to Whytecliff Park.
Address: 7102 Marine Dr, West Vancouver
Time needed: about an hour
Porteau Cove Provincial Park
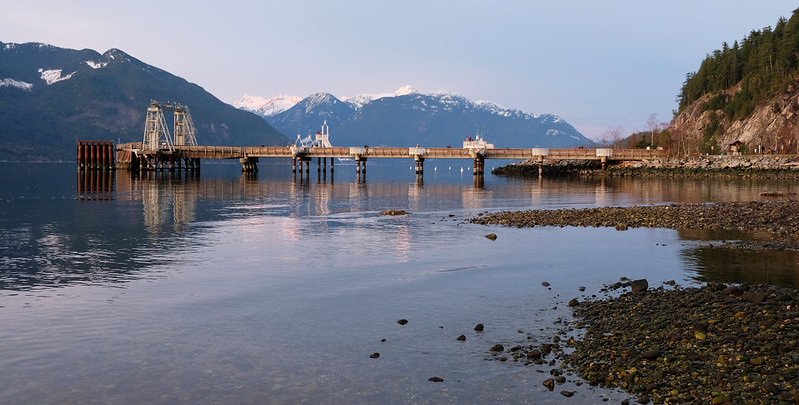
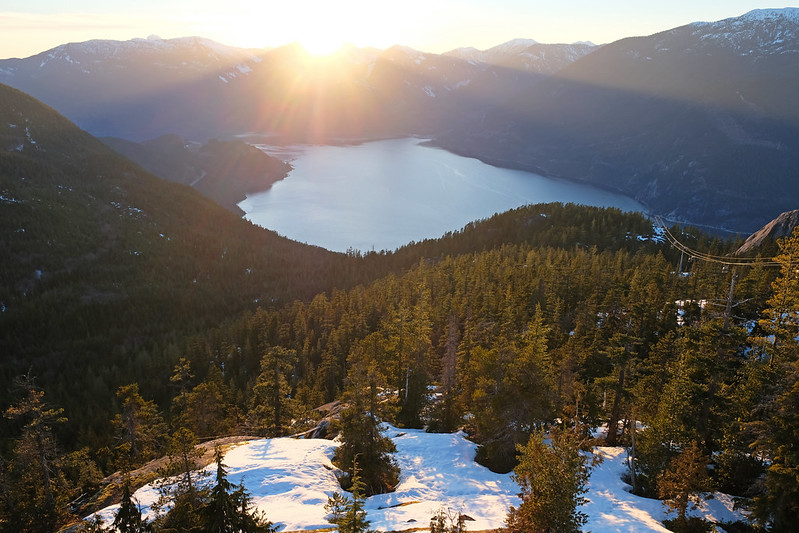
Once you leave the spectacular rainforests and coastal parks of North and West Vancouver, enjoy the views of Howe Sound as you drive directly on its shore. Your next stop can be Porteau Cove, a tiny provincial park wedged between Howe Sound and the Sea to Sky Highway. Walk out on the pier for the best views, and watch seabirds as you walk on the rocky beach. There’s also a campground in the park, but no hiking trails, so it’s really just a scenic stop to stretch your legs a bit.
It’s a beloved scuba diving site, too, because of the shipwrecks that are home to rich marine life, like octopus, lingcod or starfish.

You can save this stop for your drive back to Vancouver, and plan to arrive here around sunset. We didn’t make such plans, it just turned out that way, and we enjoyed one of the most colorful sunsets we’ve ever seen.
Address: Porteau Cove Provincial Park turnout
Time needed: about half an hour
Furry Creek Beach and Lookout
Furry Creek Beach is only 10 minutes further from Porteau Cove on the highway, and they offer quite similar views, so you can definitely choose one of them if you don’t have an endless time (or you don’t drive this route several times like we did.)
Furry Creek Beach is backed up by nice oceanfront villas, and you have to leave your car in one of the parking lots on Waterfront Drive, then walk to the beach on a pedestrian pathway. There’s a lookout point and a picnic bench.
Address: 23 Beach Dr, Furry Creek (parking is on Waterfront Drive, there are two smaller parking lots)
Time needed: about half an hour
Murrin Provincial Park
Drive another 10 minutes from Furry Creek, and you get to the next scenic picnic spot along the road. Browning Lake is surrounded by pine forests, and it’s a popular swimming spot in the summer – and a popular barbecue spot almost any time during the year.
But we like this stop for something else: here you find one of the best short hikes along the Sea to Sky Highway, with jaw-dropping views over Howe Sound! Short doesn’t mean easy though. The Jurassic Ridge Trail is a series of very steep ups and downs, including some rope-assisted sections – and some wonderful vista points.
Is it a family-friendly hike? It depends on the age of the kids. Older kids will enjoy the challenge, we carried our toddler almost all the way. It’s not the ideal trail for baby carrying, but it can be done, and the views were surely worth it.
Address: Murrin Provincial Park turnout
Time needed: 15 minutes to walk around Browning Lake, but 2-3 hours are needed to do the Jurassic Ridge hike
| Jurassic Ridge hiking essentials |
|---|
| Trailhead: parking lot at Browning Lake |
| Length: 2.9 km loop |
| Difficulty: medium |
| Check out the trail map here! |
Shannon Falls Provincial Park
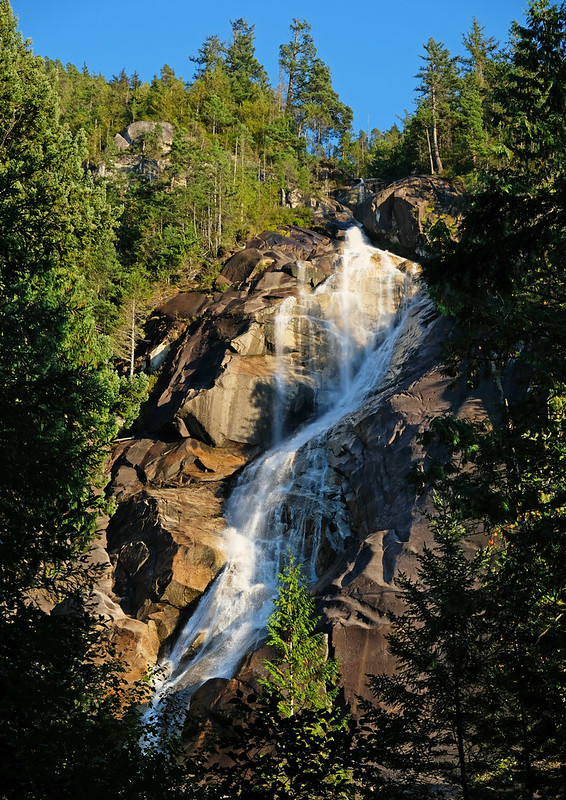
335 meters high Shannon Falls is the third tallest waterfall in British Columbia. It’s also one of the best short stops along the drive from Vancouver to Whistler.
Two viewpoints below the falls are just a short walk away from the parking lot, and you get two slightly different views of Shannon Falls from a distance. Accessing it is somewhat more tricky. You need to conquer a very steep 1.1 km long trail, supported by ropes, that starts from Darrel Bay Road (not accessible from the same parking lot, but only a short drive away). It takes you up to the pools under Shannon Falls. Most people visit only the two viewpoints, because they offer stunning views for very little work.
Address: Shannon Falls Road (parking lot is at the end of the road)
Time needed: about half an hour for the two viewpoints, extra 2 hours to complete the trail to the pools
| Shannon Falls Pools Trail hiking essentials |
|---|
| Trailhead: parking lot on Darrel Bay Road |
| Length: 1.1 km one-way |
| Difficulty: strenuous |
| Check out the trail map here! |
Sea to Sky Gondola

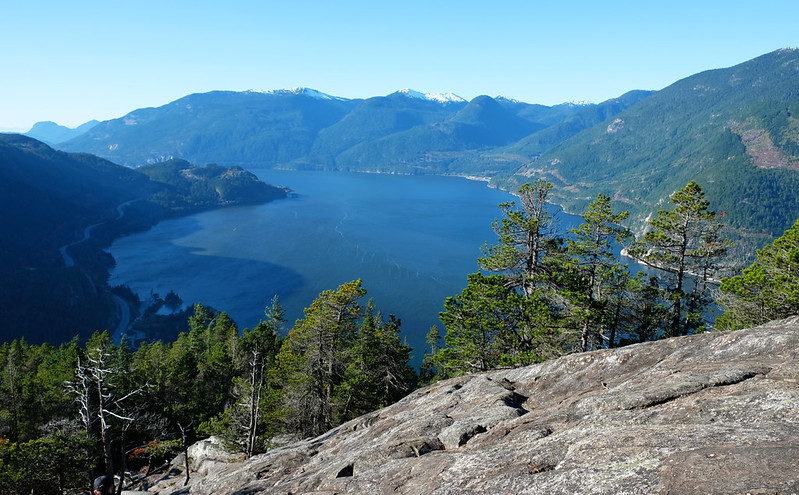
It’s a relatively new attraction, with the cable car opened in 2014, and it offers astonishing views over Howe Sound, Squamish and the Chief Mountain. Actually, any direction you look you’ll see mountains! And it’s accessible to everyone. The cable car literally takes you from the sea to the sky, from the highway up past giant granite cliffs to the Summit Lodge. There you can enjoy the panoramic views from the platform, stroll across the Sky Pilot suspension bridge and choose from several shorter and longer hiking trails.
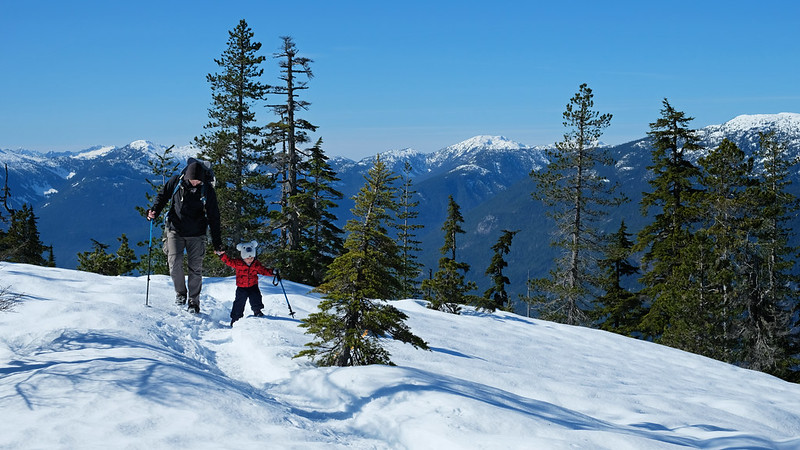
Panorama Trail is very short, almost flat, and, surprise, has some panoramic viewpoints along the way. Our favorite though? Al’s Habrich Ridge Trail. It’s about 7 km there and back, requires some effort and offers wonderful vistas all the way. Best of all, you can complete it in any season. In summer it’s a wildflower wonderland with lush greenery. In winter and early spring it takes you through a magical winter wonderland, with views of the countless surrounding snowy peaks. It’s a well-beaten track, we didn’t even need snowshoes, just a pair of microspikes.
We’ve done several scenic hikes with views of Howe Sound in the area, but the top of the Sea to Sky Gondola is hard to beat, especially if you combine it with the Al’s Habrich Ridge Trail. The downside? The tickets are expensive. It made us think twice about it, since we surely enjoyed nice views of Howe Sound from other places. But we are so happy we took the gondola, it’s worth the price.

Would you hike up to the top instead of using the gondola? The Sea to Summit Trail climbs about 900 meters over 7 km, saves you money and burns many calories. 🙂 You can still choose to take the gondola down. This option was out of question for us, carrying a 20+ kg toddler. In our couple adventure days I’m sure we would have chosen this option.
Address: 36800 Highway 99, Squamish
Time needed: any time between a few hours and a full day
| Al’s Habrich Ridge Trail hiking essentials |
|---|
| Trailhead: top of the Sea to Sky Gondola |
| Length: 3.2 km one-way |
| Difficulty: medium |
| Check out the trail map here! |
Stawamus Chief Provincial Park
Stawamus Chief First Peak
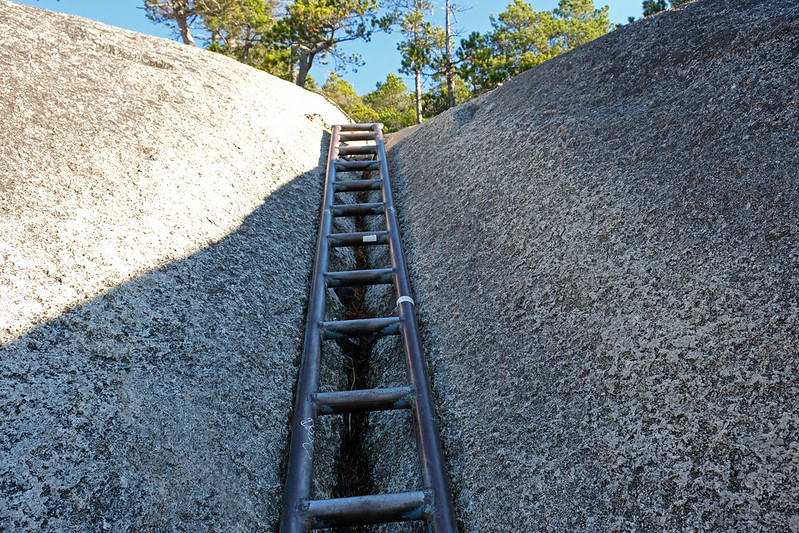
The 700 meters tall granite dome of Stawamus Chief towers above the highway, and it’s an impressive sight. But for adventure seekers it offers much more! The hikes to the Chief peaks are challenging and end with stunning panoramic views.
We enjoyed the mixture of a steep forest trail, rock scrambling and ladder climbing as we conquered the First Peak and the Second Peaks. You’ll have about 600 meters elevation gain in 2.5 km! Both peaks have incredible views, and we honestly couldn’t choose which is better. The third peak is less visited, the trail there is also much less maintained, so we didn’t do that section. (They say it’s not that impressive after the first two peaks either. We believed that.)
However, this is one hike we wouldn’t recommend with small kids or a baby carrier. We did it without Tomi, and it would have been too risky to scramble among the large rocks with him in the carrier. Small kids will also have trouble stepping big enough to climb up certain sections. I’d say it would be suitable for hikers age 5+.
Seeking for an even more adrenaline rushing activity? Sign up for a guided rock climbing tour!
If you don’t want to hike or climb, at least pull over for a quick look. Use the roadside parking lot after the pedestrian overpass.

Stawamus Chief Second Peak
Please note that Stawamus Chief Provincial Park can require a free day pass during peak visit periods. More info here!
Address: Stawamus Chief Provincial Park turnout
Time needed: a few minutes for the roadside viewpoint, a few hours for the Chief peaks hike
| First & Second Peak hiking essentials |
|---|
| Trailhead: Stawamus Chief Provincial Park parking lot |
| Length: 2.4 km one-way |
| Difficulty: strenuous |
| Check out the trail map here! |
Squamish
Services are limited on the Vancouver – Whistler drive. If you’d stop at a gas station, eat in a restaurant, taste some beer or find a place to spend the night (in case you do the scenic drive in multiple days), you can make a stop in Squamish. There’s hardly any other reason to stop there. As nice as Squamish is, there’s not much to see, and what makes it amazing are the places surrounding it and turning it into a paradise for outdoor lovers.
Best accommodations in Squamish:
- Luxury: Executive Suites Hotel and Resort (wonderful location, outdoor and indoor pool)
- Mid-range: Sandman Hotel and Suites Squamish (family-friendly, indoor pool with water slide)
- Budget: Squamish Adventure Inn (waterside location)
Downtown Squamish
Here’s where you can find some cafes and restaurants. Mags 99 Fried Chicken and Mexican Cantina is famous for its delicious burritos and enormous portions. Howe Sound Inn & Brewing offers local beer, wood-fired pizzas and rooms to spend the night.
Railway Museum of British Columbia
Truth to be told, I’m not that into trains, but in case you are (or you have a train-obsessed kid) you’ll find the Railway Museum of British Columbia an exciting place to visit. It’s located in Squamish and has all kinds of vintage train cars, engines, and parts. Some of them are more than a hundred years old.
Address: 39645 Government Rd, Squamish
Squamish Estuary and Spit
You can get nice views of the Stawamus Chief from Squamish. Drive to the Spit Road, then walk the paths of the Squamish Estuary and the Spit Flat.
Address: Spit Road, Squamish
Alice Lake Provincial Park
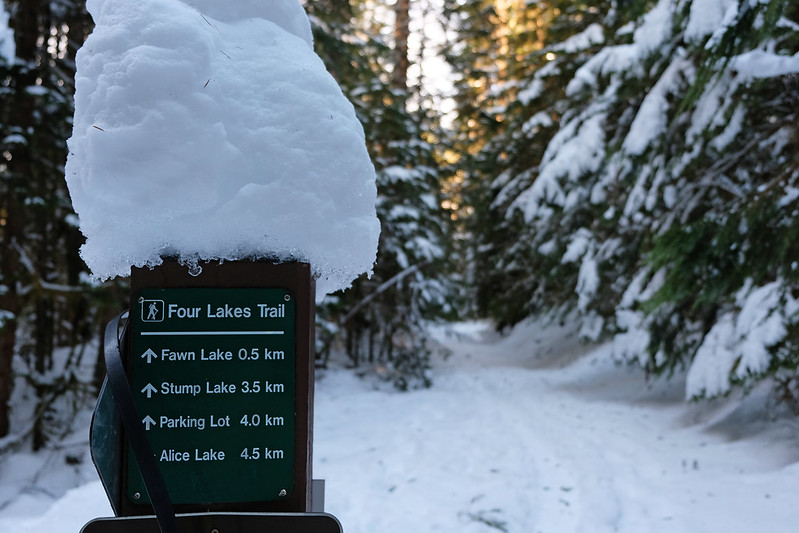
Alice Lake Provincial Park is not a must-see stop on a Vancouver – Whistler road trip, but it offers some easy hiking and lovely mountain lakes, and it also has a campground and picnic area on the shore of Alice Lake. The lake doesn’t get too pleasant for swimming, it’s better with a kayak or paddleboard in the summer.
The Four Lakes Trail is an easy 6 km loop that passes four lakes, as expected: Alice Lake, Edith Lake, Fawn Lake and Stump Lake. None of them are like Garibaldi Lake or any of those magical baby blue glacial-fed alpine lakes, but you don’t have to climb for them either. The trail has barely any elevation change, and it’s accessible all year.
Address: Alice Lake Road
Time needed: half an hour, or a few hours if you do the Four Lakes Trail
Brohm Lake Interpretive Forest

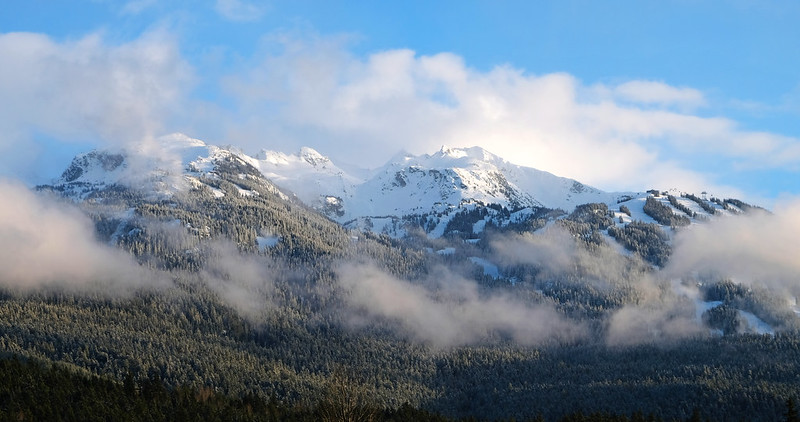
Brohm Lake doesn’t look like much from the road. It’s also not the hike to choose if you can only choose one trail on your way from Vancouver to Whistler. But it turned out to be a pleasant surprise for us. Brohm Lake is nice, the path in the forest meanders through small bridges, but the real highlights are the peak views on the western side of the loop. Tantalus View Trail was our favorite, the following ones couldn’t beat that, but they were still quite pretty!
We recommend doing this trail if you visit in spring, because at that time the surrounding peaks are snowy and look magical, and higher elevation trails are not yet accessible. This is a perfect shoulder season hike in the Squamish – Whistler area.

Address: Brohm Lake turnout (there’s a small left-hand turn lane)
Time needed: about 3 hours
| Brohm Lake Interpretive Forest hiking essentials |
|---|
| Trailhead: Brohm Lake Day Use Recreational Site |
| Length: 8 km loop |
| Difficulty: medium |
| Check out the trail map here! |
Tantalus Lookout

An easy roadside viewpoint stop. Well, actually, you can only access it when you are driving southbound from Whistler to Vancouver, because left turn is forbidden on the northbound route. So save it for your trip back, and don’t forget to pull over, because the Tantalus Range is a breathtaking mountain range west of Squamish, with snow-capped peaks for most of the year.
Address: Tantalus Lookout (access from the southbound route)
Time needed: a few minutes
Garibaldi Provincial Park & Garibaldi Lake
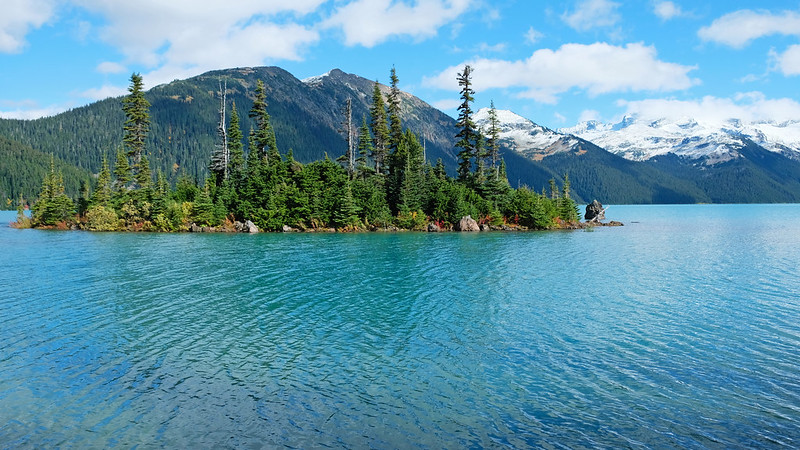
The Garibaldi Lake hike is one of the most popular trails in all British Columbia. Granted, Garibaldi Lake is also one of the most beautiful alpine lakes we’ve set our eyes upon. But it’s not a quick roadside stop, it’s a full day hike. We’ve written a detailed guide about visiting Garibaldi Lake, possible extensions of the hike and other amazing alpine lake trails in Garibaldi Provincial Park – read it here!
Address: Daisy Lake Road (Rubble Creek Trailhead parking)
Time needed: a full day
Read this, too: Garibaldi Lake Hike, British Columbia: Is It Worth The Hype?
Brandywine Falls Provincial Park
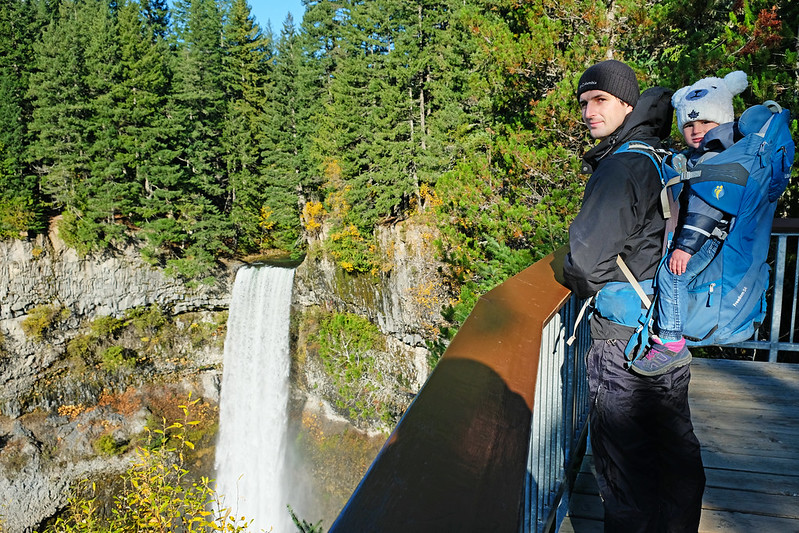
Our favorite waterfall on the Sea to Sky road trip? Brandywine Falls! With 70 meters, it’s not nearly as tall as Shannon Falls, but it’s powerful and it’s a single drop, flowing over lava columns. It takes about a 300-400 meters walk to reach the viewing platform from the parking lot.
Please note that the parking lot is closed in the winter season. You can hike to Brandywine Falls on a much longer route (like from the Cal-Cheak Recreation Site). People often still park in front of the closed gate, but beware that it’s not allowed, and your car can be towed.
I surely vote for it as the best waterfall along this highway. Oh, well, except there’s another one close by…
Address: Brandywine Falls Provincial Park turnout
Time needed: about half an hour
Alexander Falls viewpoint

Here’s another roadside beauty that competes with Brandywine Falls. The viewing platform of Alexander Falls is right by the parking lot at the Alexander Falls Recreation Site which can be accessed on a 10 minute drive on Callaghan Road. This section of Callaghan Road is paved, no worries, any car can access it, only the last few hundred meters to the parking lot is a dirt road, but you can choose to walk it if you’re unsure about driving.
Alexander Falls is 43 meters tall and drops down in several tiers. It’s so graceful and so captivating any time of the year, yet much less crowded than Brandywine Falls. Winter access is not a problem either. You likely won’t be able to drive the last few hundred meters on the dirt road to the parking lot, so just park along Callaghan Road and walk the rest.
Address: Alexander Falls Recreation Site along Callaghan Road
Time needed: about half an hour
Whistler Village
Whistler Village and Squamish have one thing in common: it’s their location that makes them tempting. Whistler could be your next gas stop and restaurant stop. Otherwise, it offers world-class skiing, snowboarding and snowshoeing in winter, and tons of hiking and mountain biking trails in the summer.
The Valley Trail is the best attraction in the village, but again, it’s not your typical sightseeing attraction. It’s a car-free, paved path that connects Whistler’s neighborhoods, lakes and viewpoints. Altogether, it’s more than 46 km, and walking, running, cycling or rollerblading certain sections of it is just as popular among locals as among visitors.

Lost Lake is our favorite of the Whistler Lakes as it’s the quietest one. It takes about half an hour to walk around it, and it’s particularly pretty in late fall or late spring when you can see all the snow-capped mountain peaks surrounding it in the distance. From December to March it’s a maintained snowshoeing trail, so you need to buy a ticket to access Lost Lake.

Green Lake is right by the Sea to Sky Highway. You can find limited parking at the end of Golden Bear Place, then walk on the lakeshore all the way to secluded Fitzsimmons Park. Our favorite time for this walk is also winter, the snowy peaks around the lake are jaw-dropping! No need to hike for a dreamy winter mountain panorama.
Both Lost Lake and Green Lake are accessible from the Valley Trail, but you can access them directly by car, too.
Our recommended stays in Whistler:
- Luxury: The Westin Resort & Spa – One of the best locations in Whistler Village, steps from the gondolas. Spacious suites, spa facilities, and an outdoor pool make it ideal for families or couples wanting comfort after a day outdoors.
- Mid-range: The Listel Hotel – A well-located option with comfortable rooms and good value for central Whistler. Easy access to both the Village and the Sea to Sky Highway.
- Budget: Pangea Pod Hotel – A modern capsule-style hotel in an unbeatable village location. A great choice if you want to stay centrally without paying resort prices.
Sea to Sky Highway sample itineraries
Now that we’ve finished the long list of roadside attractions, you might say that this all sounds good, but you only have a day or two to do this drive, so what should you include? While I encourage you to plan at least 2-3 days to get the most out of your Sea to Sky Highway road trip, I’m doing my best to select the best of the best sights for you. I put together some sample itineraries, and while most of the attractions can be visited all year, these itineraries are planned for the long summer days. You simply won’t have enough daylight to enjoy all the attractions on a much shorter winter day.
Don’t just visit BC. Experience it.
Discover BC’s hidden gems and breathtaking routes without the planning headache. Your perfect road trip is just a click away.
Last note: times in the itineraries are indicative. They are there to help you estimate how much time you need for a certain stop, not to set a timer, of course. 🙂
1 day itinerary for the Vancouver to Whistler drive
One day is a short time for this route, so if that’s all you have, focus on the short stops and panoramic viewpoints. Visit Capilano Suspension Bridge Park and Lynn Canyon on another day. Drive through Lions Gate Bridge early in the morning, then:

- do the short hike to the waterfalls in Cypress Falls Park (8:30 – 10:00)
- stop for a morning picnic in Whytecliff Park (10:00 – 11:00)
- 30 mins drive to Shannon Falls Provincial Park (11:00 – 11:30)
- walk to the two viewpoints of Shannon Falls (11:30 – 12:30)
- take the Sea to Sky Gondola, walk the Sky Pilot suspension bridge and the Panorama Trail, have lunch in the Summit Lodge (12:30 – 16:00)
- Stawamus Chief viewpoint by the highway
- drive about an hour to Brandywine Falls Provincial Park (16:00 – 17:00)
- walk to the Brandywine Falls viewing platform (17:00 – 17:30)
- drive to Alexander Falls, enjoy the waterfall lookout (17:30 – 18:00)
- take a walk at Green Lake or Lost Lake in Whistler (18:00 – 19:00 )
Whistler to Vancouver drive at the end of the day:
- quick stop at Tantalus Lookout
- take a walk on the pier at Porteau Cove, ideally around sunset (which is ~9 pm in the summer)
2 days itinerary for the Vancouver to Whistler drive
If you have 2 days, I definitely recommend including some of the longer hikes. You have two choices: either you choose the hike to Garibaldi Lake which takes a full day, or you choose several shorter hiking trails. In the first case, use the 1 day itinerary for Day 1, spend the night in Whistler Village, then hike in Garibaldi Provincial Park on Day 2.
If you want to enjoy several shorter panoramic hikes, here’s my idea of how to spread them along the drive:
Day 1:
- start from Lions Gate Bridge early in the morning
- Capilano Suspension Bridge Park (8:30 – 11:00)
- drive up to Cypress Mountain Lookout (11:00 – 11:30)
- hike in Lighthouse Park: Juniper Point, Shore Pine Trail, West Beach Trail lookout (11:30 – 13:00)
- 30 mins drive to the Sea to Sky Gondola (13:00 – 13:30)
- take the Sea to Sky Gondola, walk the Sky Pilot suspension bridge, have lunch in the Summit Lodge and hike the Al’s Habrich Ridge Trail (13:00 – 18:00) – the time of the last down ride varies through the year, please check it here before you go
- drive to Shannon Falls Provincial Park, walk to the two viewpoints of Shannon Falls (18:00 – 19:00) – this stop is before the gondola if you drive northbound, but it’s only a few minutes drive back, and this park is open until dusk, so it’s more convenient to do it after the gondola ride
- Stawamus Chief viewpoint by the highway
- spend the night in Squamish

Day 2:
- start your day in Squamish
- conquer the First and Second Peaks in Stawamus Chief Provincial Park (8:00 – 12:00)
- drive about an hour to Brandywine Falls Provincial Park (12:00 – 13:00)
- walk to the Brandywine Falls viewing platform (13:00 – 13:30)
- drive to Alexander Falls, enjoy the waterfall lookout (13:30 – 14:00)
- take a walk at Green Lake or Lost Lake in Whistler (14:00 – 15:00)
- then start your drive back to Vancouver
- quick stop at Tantalus Lookout, half an hour drive from Whistler (~15:30)
- 30 mins drive to Murrin Provincial Park (15:30 – 16:00)
- hike the Jurassic Ridge Trail from Browning Lake (16:00 – 19:00)
- drive to Porteau Cove and take a walk on the pier (19:00 – 20:00) – you can wait until sunset, or…
- drive to Whytecliff Park and enjoy the sunset on the beach (20:00 – 21:00)
- spend the night in Vancouver
3 days itinerary for the Vancouver to Whistler drive
This is the ideal minimum time to fit in all the most beautiful roadside stops, waterfalls and hiking trails. Here you go:
Day 1 can be exactly the same as in the 2 days itinerary, but when you start Day 2 in Squamish, you drive northbound to Rubble Creek Trailhead (about 30 mins drive) to hike to Garibaldi Lake. This is a full day hike, and if you reach the lake early, you can extend your hike to Black Tusk or the Panorama Ridge. Either way, use all the daylight hours for Garibaldi Provincial Park, then spend the night in Whistler.

Day 3:
- start your day in Whistler
- take a walk at Green Lake or Lost Lake in Whistler (8:30 – 9:30)
- drive to Alexander Falls, enjoy the waterfall lookout (9:30 – 10:30)
- drive to Brandywine Falls Provincial Park and walk to the viewing platform (10:30 – 11:30); then start your drive back to Vancouver
- quick stop at Tantalus Lookout, half an hour drive from Whistler (~12:00)
- 30 mins drive to Stawamus Chief Provincial Park (12:00 – 12:30)
- conquer the First and Second Peaks of Stawamus Chief (12:30 – 16:30)
- drive to Porteau Cove and take a walk on the pier (16:30 – 17:30)
- drive to Whytecliff Park, chill on the beach until sunset (17:30 – 19:00)
- spend the night in Vancouver
Where to stay along the Sea to Sky Highway
Squamish and Whistler Village are the straightforward towns to spend the night somewhere with four walls during your road trip. There’s also plenty of campgrounds and RV parks.
Squamish accommodation

Executive Suites Hotel and Resort offers a pampering luxurious stay in Squamish. It already impresses with its location: reflecting into Squamish River and being surrounded by lush green parklands and mountain views. You can choose from studios, one-bedroom and two-bedrooms suites, and all come with a kitchen. It’s one of the few Squamish hotels with a pool, both an indoor and outdoor pool. There’s also a gym and a pub on-site.
Sandman Hotel and Suites is a 3-star hotel in Squamish, just off the Sea to Sky Highway. This makes it a convenient base to explore the mountains surrounding Squamish, and also a great place to spend the night on your way to Whistler.
Squamish Adventure Inn is the best budget-friendly hotel in Squamish. It has a great location, just off the Sea to Sky Highway, still walking distance from downtown and right beside the water. It’s a hostel, but it offers both dorm rooms (mixed or female only) with shared baths and private rooms.
Whistler accommodation

The Westin Resort & Spa is a truly luxurious hotel in Whistler Village. It offers an outdoor pool, two hot tubs, an on-site spa and wellness center, and it’s located at the base of Blackcomb Mountain.
The Listel Hotel is a mid-range hotel choice in Whistler Village, still at an excellent central location, close to plenty of shopping and dining opportunities. If you’re on a tighter budget, Pangea Pod Hotel could be a good option. It’s a capsule hotel in the center of Whistler Village, offering pods that are grouped in suites, and all suites come with a bathroom. You’ll have your cozy bed at a great location.
But if you’re looking for less luxurious and more affordable places, stay outside of Whistler Village. Choose a room in one of the lodges in the Upper Whistler, North Whistler, Creekside or Alta Vista neighborhoods. If you visit in the summer and for one night only, you don’t need to consider access to ski lifts, so it doesn’t really matter which area you choose. Pick the best price-value offer.
Lost Lake Lodge is 6 minutes walk from the Lost Lake beach (yes, you can swim there in the summer) and offers different types of suites and apartments. Guests can also use the outdoor heated pool, the gym and the hot tub.
Lake Placid Lodge is in the Creekside area, 10 minutes drive away from Brandywine Falls Provincial Park. It offers condos with a full kitchen and a balcony. There’s also an outdoor pool and a hot tub.
Campgrounds and RV parks

Camping is definitely the cheapest option for accommodation, and British Columbia has campsites in incredibly wonderful natural settings. The downside? You need camping equipment. But in case you’re doing this trip as part of a longer road trip or RV trip, you can easily take advantage of the countless campgrounds this area offers.
Provincial parks usually offer the most affordable and simplest sites. Some require reservation, some are first-come, first served. Please check them in advance – and book as much in advance as possible, especially for the summer. Camping is popular in Canada.
Provincial park campgrounds are in:
- Porteau Cove Provincial Park
- Alice Lake Provincial Park
- Stawamus Chief Provincial Park
Other campgrounds near Squamish:
- Klahanie Campground: a family-owned campground with over 100 camping sites, suitable for RVs, truck campers, tent trailers and tents
- Squamish Municipal Campground
- Mamquam River Campground: run by a non-profit organization (the Mamquam River Access Society), affordable and quite basic, offers no electric or water services
- MTN Fun Basecamp: a private campground that offers tent sites, RV sites and hotel rooms; there’s free wifi and hot showers
- Paradise Valley Campground: a music free family campground; they also offer a luxury cabin suitable for 12 people
- Cat Lake Recreation Site: walk-in campsites around the lake
Other campgrounds near Whistler:
- Whistler RV Park and Campground: it offers full hook ups (sewer, water and electricity) for all RV sites and tent camping with washroom and hot showers
- Cal-Cheak Recreation Site: it has 55 basic drive-in sites, with water and pit toilets
- Riverside Camping & RV Resort: it offers RV sites and walk-in tent sites, but also log cabin and yurt rentals
Sea to Sky Highway road trip FAQ
Can you drive from Vancouver to Whistler in the winter?
Yes, you can drive the Sea to Sky Highway all year. Whistler is a popular skiing destination, the snow is plowed on the highway. However, between October 1st and March 31st winter tires are mandatory. Also, you can get caught in a snowstorm, and road conditions can be snowy or icy, despite regular plowing. On that note, heavy rain or dense fog can occur any time of the year, but it’s very common between November and March. Here you can check the webcams.
Another thing to consider is that high altitude hiking destinations (like Garibaldi Lake) are accessible only from July to mid-October.
Which are the best stops along the Sea to Sky Highway in winter?

First of all, let’s see which stops are not accessible: Garibaldi Lake and Brandywine Falls Provincial Park parking lot (the waterfall is accessible on a longer hiking trail from the Cal-Cheak Recreation Site). The Jurassic Ridge Trail and the Chief Peaks are snow-free for most of the year, but there could be a short period in late December or January when you face winter conditions there. Coastal trails and parks are usually snow-free.
The Sea to Sky Gondola operates all year, however, it could be shut down for bad weather days (mainly because of stormy winds).
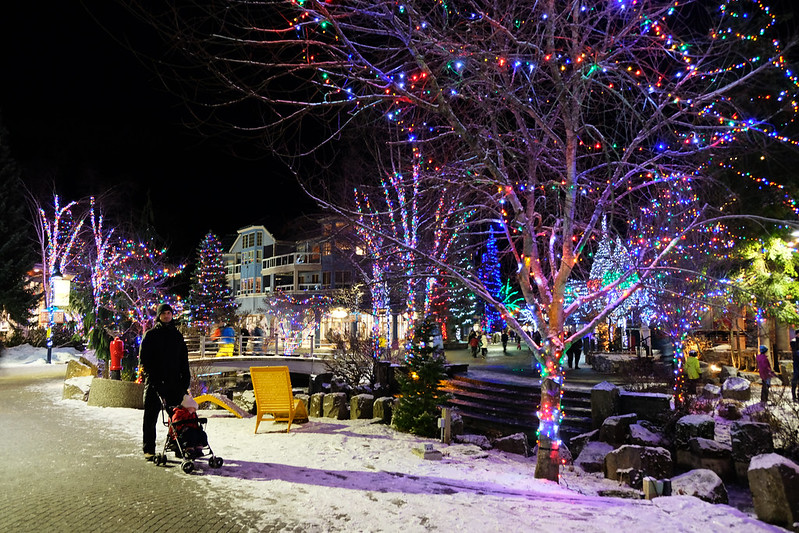
But then which places are magical to visit on a winter road trip? Capilano Suspension Bridge Park gets wrapped in Christmas lights from late November until late January, which makes this already special park even more memorable. Whistler Village is also illuminated with Christmas lights during winter, and the Valley Trail is the most spectacular when everything is buried in snow.
Is there a best time for this scenic drive?
We enjoyed the Sea to Sky Highway in every season. However, it’s easier to enjoy it on a clear day, and your best chance for clear days is between May and September – which happens to be the busiest and most expensive season for visiting, as well.
Since we live here, we can wait for clear days in the fall and winter months, too, but we often had to wait a week or two to finally have a clear day – or just a day when it’s not pouring all day long.

Which provincial parks along the way require day use passes?
To limit visitor number in order to prevent crowded facilities and impact on wildlife and local communities, day use passes are required to visit some provincial parks during peak periods. In 2022 Garibaldi Provincial Park requires visitors to have a day pass, starting June 17. Stawamus Chief Provincial Park required a day pass in the 2021 summer season, but it looks like it won’t be in effect for 2022.
You can check the most up to date info on which parks require day passes on the BC parks website – where you can also reserve the day pass if needed. Day passes are free and can be booked only shortly before your intended visit.
Leave a Reply